Book traversal links for A1.1 – Test administration
Step 1. TB Screening
In an integrated and person-centred TB infection cascade of care, the first encounter with a provider will include initiation of both screening for TB disease and testing for TB infection. Just before administration of the TST or TBST, TB disease screening should be done; it should include a TB symptom check and preferably where available use more sensitive tools recommended by WHO such as CXR (with or without computer-aided detection), WHO-recommended rapid diagnostics or C-reactive protein for People with HIV. If a contact has clinical features that suggest TB disease, then that person should be referred immediately for further diagnostic evaluation, which should be done on the same day.
Where a contact has no symptoms or has only non-TB-related respiratory symptoms (e.g. a sore throat or rhinorrhoea, with a duration of only a few days), then TB infection testing can be initiated, and these symptoms can be re-evaluated 48–72 hours later. It is important to aim to minimize loss along the TB infection care cascade. The decision to immediately evaluate an individual with symptoms, or to perform TB infection testing and re-evaluate symptoms at the time of reading, is a matter of clinical judgement.
Step 2. Explain the administration of TST or TBST
Signed informed consent is not considered necessary for TB infection testing because this is part of routine care; however, the person being tested should understand the procedures and agree to them. In cases where a child is administered the test, consent by a parent or guardian is required and the presence of the parent or guardian may be necessary. The provider should take time to explain the test procedures and emphasize the need to return for test reading within 72 hours. The provider should verify that the person can return within this time frame for the test to be read; the provider should also respect the individual’s confidentiality and privacy.
If an mHealth approach is being used to measure the size of swelling immediately after intradermal injection as a quality control (QC) procedure (mTST) (1) or similar) the provider should explain to the patient that photos will be taken of the injection site immediately after the injection.
Step 3. Prepare for the administration of TST or TBST

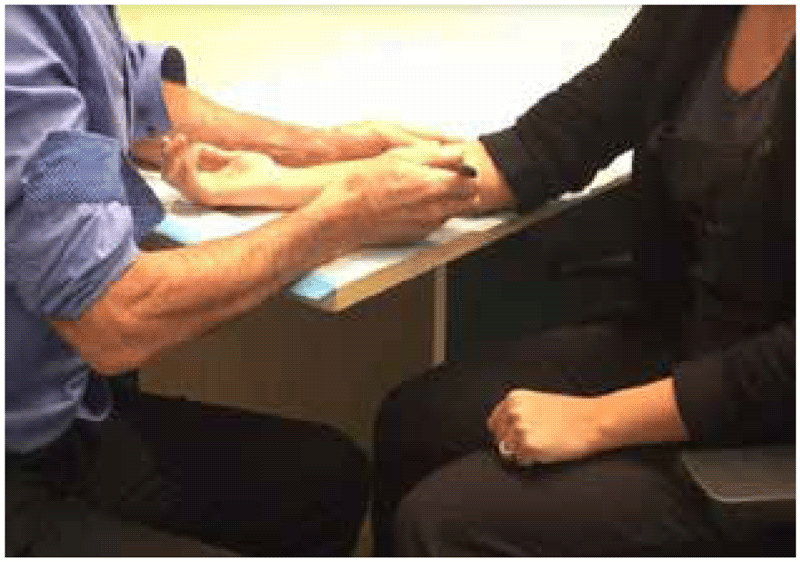
It is important that the person undergoing the TB infection test is comfortable while the test is being administered. The person should be seated with their arm supported on a flat surface, such as the corner of a table, facing the provider who will administer the TB infection test. Where possible, the TB infection test should be administered in a private room, with only the person being tested in attendance (family members are appropriate).
Step 4. Select site for injection

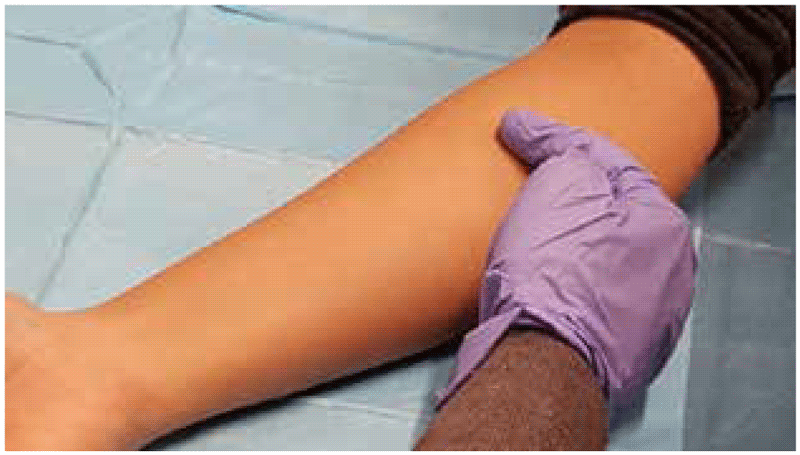
TST and TBST tests are generally administered on the inner aspect of the forearm, about 10 cm below the elbow (middle to upper third of the forearm). The area to be injected should be free of recent cuts, burns or other injuries, and not affected by a rash or eczema. The area should also be free of scarring, particularly keloids. Skin disease or scars may interfere with the injection and proper reading of the result; also, they may cause greater discomfort from the test. The presence of tattoos is not a problem unless erythema also needs to be measured (for C-TST only). If there are such skin problems, then another site should be selected for injection.
Step 5. Prepare the syringe
Draw up the test dose in a 1 mL syringe that has markings to indicate each 0.1 mL (or smaller units). It is important to eliminate air from the syringe, to prevent accidentally injecting air into the patient and to ensure that the full test dose is administered. The syringe should be prepared just before the injection; older studies with standard purified protein derivative (PPDS) demonstrated reduced sensitivity if syringes were prepared more than 20 minutes before injection (2). If the mTST QC programme or similar is in place, the smartphone or digital camera should be prepared, so that the provider is ready to take photos immediately after the injection.
Step 6. Clean the injection site
Opinion varies on how best to clean the injection site. Alcohol swabs may be used, but this may cause greater pain unless the alcohol is allowed time to dry completely (it is important not to blow on the site, because this will reinfect the area). Allowing the alcohol to dry completely is especially important when administering the test to a child. Cleaning the area with sterile saline or water is adequate and will cause less stinging if the liquid has not fully dried at the time of injection.
A topical anaesthetic should not be applied, because this can sensitize the skin. There have been case reports of induration resulting from topical anesthetics (2), and that induration will be mistaken for a positive test at the time of reading.
Step 7. Administer the injection

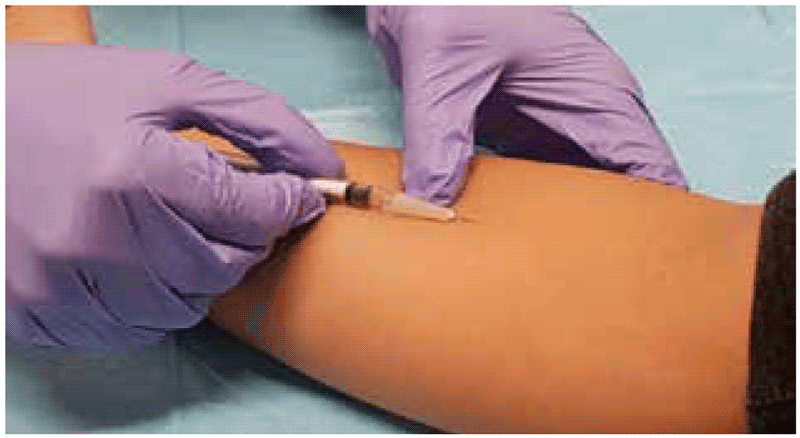
All TB infection skin tests (TST or TBST) are administered using the Mantoux method of intradermal injection. This method of administration was first described for TST many decades ago (3), and the manufacturers of the three TBSTs have all described this same method in their product monographs (4–6). The material must not be injected subcutaneously because this makes it more difficult to measure the result and can even lead to false negative results.
A needle (25 gauge to 27 gauge) is placed on the syringe, which is then laid flat on the skin with the bevelled side upward. The provider then slides the needle under the skin (the tip of the needle is often visible even when it is intradermally). The material is then slowly injected (over 2–3 seconds). In cases where the test material runs out initially, the needle should be pushed in a little deeper. A small induration or papule or bleb (“weal”) should form. This bleb should be at least 7 mm in diameter (1). When the injection is finished, the needle should be withdrawn.
Step 8. After the injection

After the injection, there should be a small induration or bleb on the skin. If there is a little bleeding, this can be wiped away. There is no need to cover the injection site with a dressing or bandage, and no need to mark the spot (having a large circle or an X on the forearm may be stigmatizing, particularly for children).
Step 9. Take photographs (for mHealth – if applicable)
If an mHealth QC programme is in place, then the provider should take several photographs of the injection site. The syringe should be placed with gradation markings visible, 2 cm away from the injection site (towards the elbow). Once the patient has left, the best three photographs should be sent to the supervisor.
Step 10. Provide post-TST care
The patient should remain seated in the clinic area for 10–15 minutes. This is for surveillance in case of allergy or anaphylaxis, which is rare (1 per million) (25), or vasovagal fainting, which is much more common than anaphylaxis and can result in injury from an unprotected fall. If an individual feels faint during or after injection, then ensure that the person is protected from falling and immediately record vital signs, particularly blood pressure and heart rate. If the heart rate is rapid and the blood pressure low, and particularly if there are any other signs of anaphylaxis, provide care for a potential anaphylactic reaction. If the heart rate is low (<60 beats per minute), then this is much more likely to be a simple vasovagal faint. Position the patient with their head down and use other manoeuvres effective for vasovagal reaction.
At the time of discharge, educate the patient about care of the injection site; in particular, not to scrub vigorously when washing or to scratch if there is significant itching. If there is any blistering or pain, advise the patient that they can use cold compresses and take nonsteroidal anti-inflammatories for relief.
Step 11. Arrange for the result to be read
Remind the patient of the need to return 48–72 hours later for the result to be read and provide them with an appointment (with date and time) to come for the reading. Flexibility is important to accommodate patient schedules. Ideally, the reading should be scheduled after 48 hours, so that if the patient is unable to come, the reading can be rescheduled for the next day and still fall within the 72-hour maximum window for reading. The person tested should be aware that the reading is not valid if more than 72 hours have elapsed since administration.
Step 12. Record the result and document details
In the patient’s medical record or on specific forms or registries, as appropriate, it is important to record the following details regarding the test administration:
- name of person administering the TST or TBST;
- date and time of administration;
- product used and lot number;
- date on which the product vial was opened (if vials are used over multiple days, based on manufacturer instructions);
- site of injection;
- whether a bleb was seen, and any bleeding or leakage of test fluid;
- any adverse event – if the patient had hypotension or loss of consciousness, it is crucial to document whether this was due to vasovagal reaction or anaphylaxis; and
- date and time of appointment for reading.
 Feedback